Components Introduction
Tiny Ambience had prepared assets and components that can implement game-appropriate ambiences based on a set of core ideas explained earlier. Let's get to know them briefly for now. (Real instruction how to use them comes in the Getting Started tab.)
We will now using Unity terms in this article.
Designing the layers : 
AmbienceLayer
Each of this asset type represents one layer of the layers explained in core ideas.
Each layer could be one of these 3 Layer Modes :

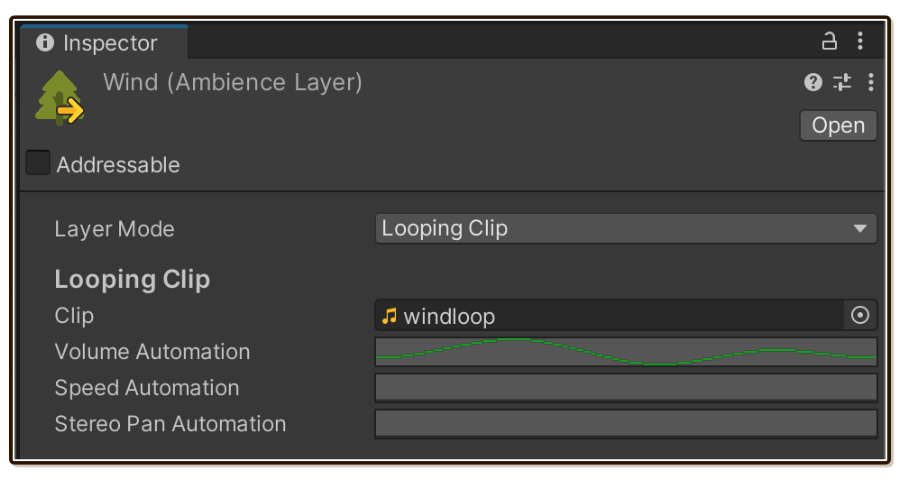
Looping Clip Layer Mode is the most basic of all 3, it loops a single clip. But it can do one thing impossible in others : seamless looping. Your ambience is bound to have one or more Looping Clip, it is like stock base of your soup.
Parameter changes discussed earlier is called automation here. Length of automations do not need to match the clip's length. It is a great way to create variations making the loop sounds longer.
Now we need the birds to help out this looping wind that may gets repetitive after a while. Birds are animals and should be behavioural. It would be rude to the birds if we just loop a clip here.
One Shot Program Layer Mode can cover this design.
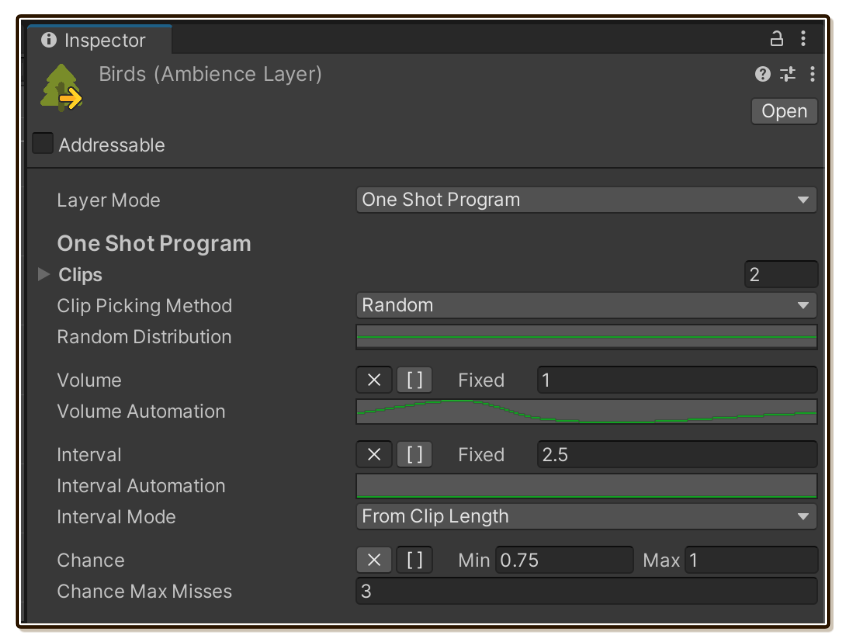
The picture above demands quite a lot, which would normally make your programmers cry if you are the field recording guy : It selects randomly from 2 variations of bird noises. Whichever was selected will be played at volume curve that changes over time. The next bird will play 2.5 seconds after the end of picked clip's length, but there are 75%~100% chance of playing, in other words 0%~25% chance of birds getting too lazy to chirp.
Unlike Looping Clip Layer Mode, One Shot Program is non-linear. It will really spice up your ambience!
Lastly, the Timeline Layer Mode is linear like Looping Clip, but gives you a blank canvas that let you get creative and go nuts to virtually create a new audio.
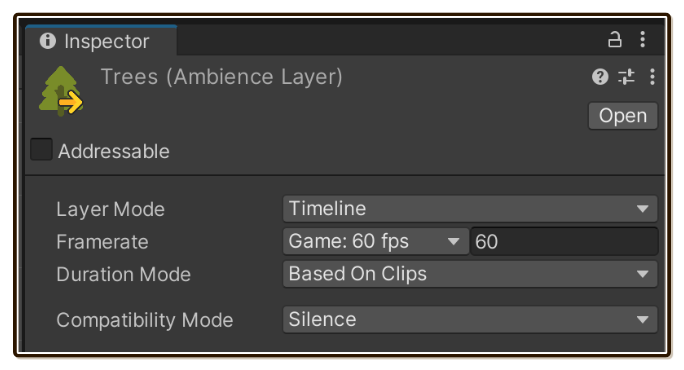
Trees layer to complete the wind and birds can be implemented with this layer type. Unlike the wind, you may want some moment that trees settled down, some moment where they chimes violently, or some moment that it sounds a bit brighter and darker.
This requirement is difficult to "program" with One Shot Program. Unity Timeline tab is an underrated tool that let you do all this visually and intuitively. You can slice, stretch, fade in/out/cross fade clips.
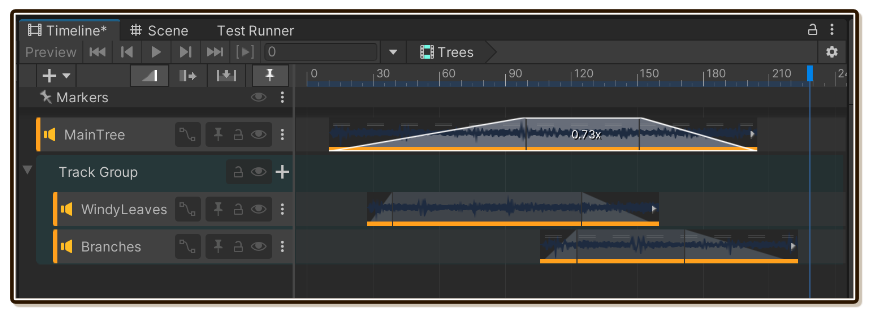
Just make sure don't put anything that requires seamless looping here (the edge of timeline should be silence), that goes to Looping Clip.
You can even draw automation curve over them!

Seriously, not enough plugin author utilized this tab enough.
All the layers together : 
Ambience

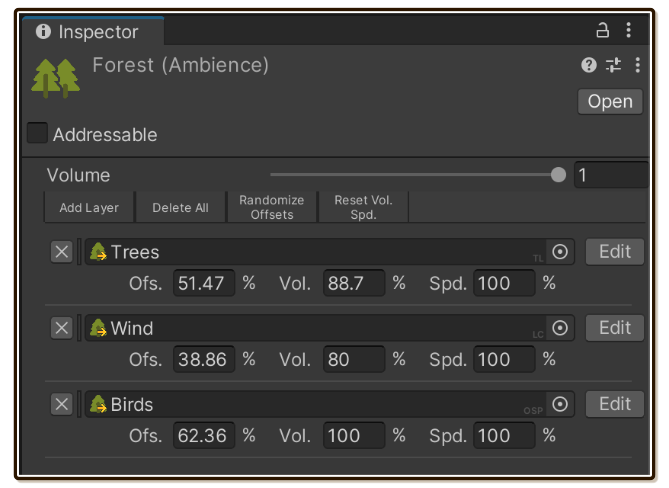
An asset simply called Ambience is an array of independenly looping AmbienceLayer. Each one is a new unit that you use to play.
The goal is to make the ambience sound natural, employing techniques previously discussed such as syncopation. If you are already utilizing all 3 types of layer together, chances are your ambience will already sounds natural!
A central set of AmbienceLayer can be used to create different Ambience to use in different area in the game without any increase in device space requirement.
On each item, other than the reference to AmbienceLayer we also have the adjustments. They are values stored per each layer. It is the key to reuse your central AmbienceLayer in different roles. One AmbienceLayer maybe the main actor in one Ambience but supporting details in the other by using the Volume Adjustment.
The player : 
AmbienceSource
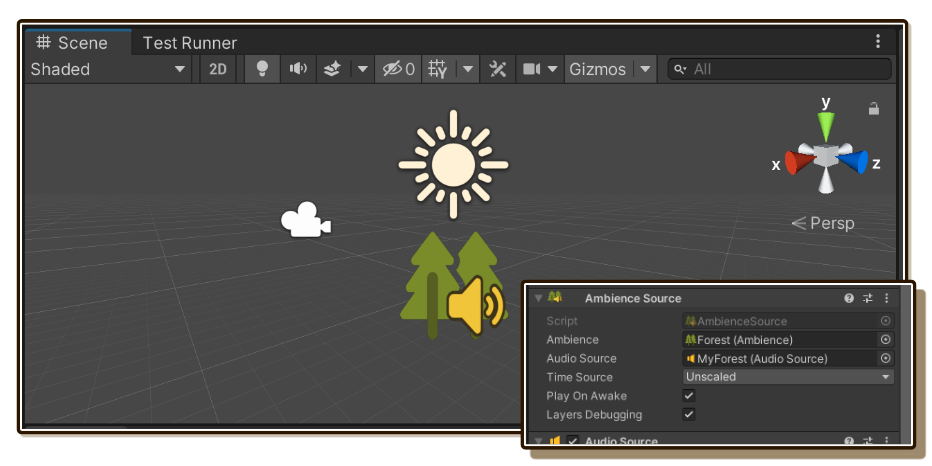
Finally, you give a reference of Ambience asset you worked on to AmbienceSource to play.
This simply mirrors relationship of AudioClip and AudioSource so you can play, stop, pause, resume your AmbientSource as one unit.
AmbienceSource will require a crucial reference to the good-old AudioSource as its output target for all AmbienceLayer plays. This is an advantage. It enables all feature set of Unity-native audio such as AudioMixerGroup, audio effects, or spatial blend. Many ambiences want be positional, such as birds that only could be heard near trees.
From this point on, you can use your existing knowledge of Unity audio.
You are ready to start!
- Demo And Samples : Listen to Tiny Ambience even before you purchase it, or try importing some samples.
- Installing : After you decided to get Tiny Ambience, here's how to install it into your project.
Then head right to the page about those three components :

AmbienceLayer: It all starts from the layers. I have provided separated pages for each layer mode : Looping Clip, One Shot Program, and Timeline.
Ambience: Learn how to create a playable asset from layers and what else could you play around with.
AmbienceSource: Learn how to setup the source in your scene to get your ambience running.