
AmbienceLayer - Looping Clip
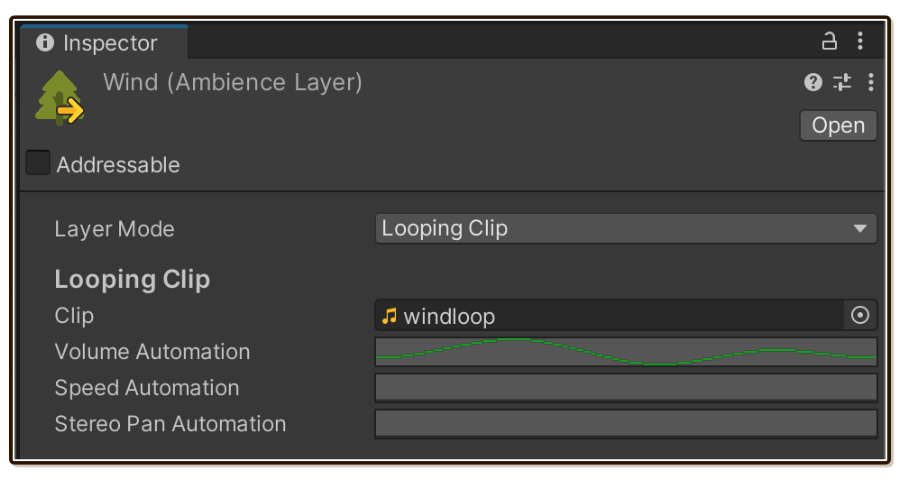
This layer type is probably essential in your ambience. It simply loops a single clip seamlessly.
Creating it

AmbienceLayer can be created from right click menu. Select Tiny Ambience > Ambience Layer.
It will already starts with Looping Clip mode.
When to use it
For constant stream of sounds in your ambience.
If you go out to record some ambiences with no Tiny Ambience in mind, this is probably the way your common sense tells you how the clip would be played : looping it. Who wants to play an ambience only once?
Under the hood it is implemented using the way you are probably expecting : AudioSource with a clip connected then check the Loop checkbox.
Looping Clip is the foundation
Since it is a single continuous clip, Looping Clip layer is where you ensure there is alway something going on in your ambience, just like in the real world.
If you want more, just add more Looping Clip layer of different length and let them overlap in syncopation.
Later on you will learn about 2 other types of layer. But still you should aim to make the ambience almost complete with just this Looping Clip type. Using multiple syncopating Looping Clip generally produces better result than only one Looping Clip then try to fill in details with other type of layers. Typically, I recommend using the other type of layers as only small finishing touches.
Looping noise floor
Clip used for this could be "nothing", as in there is nothing occuring in the recording but a sense of that location is there.
When you start adding more ambiences, you will need to keep something playing even when the birds aren't making any noises or the wind isn't blowing.
Clip used for this purpose can be extremely short, we make it more interesting with more layers. Preferrably, you should obtain this noise floor from the same location as the other stuff you want to layer on.
Seamless looping
This is the only way Unity can provide seamless looping at audio sample level. Not even audio clip in Timeline that are aligned carefully can loop seamlessly. Timeline "evaluates" the current bit of time rather than "play".
Looks like that innocent Loop check box has much more going on at hardware level depending on your platform of choice. It could get complicated combined with import type like Streaming from engine programmer's standpoint. I had worked on Native Audio plugin before and it was hell getting it to natively loop!
(Actually Unity has one more way, PlayScheduled, but that requires calling it ahead of time. My other product Introloop works with that method at the core.)
Some audio editing is required
As it loops an entire clip from the end to start with no helping hand (like crossfades) whatsoever, an audio needs to be edited so the end and start loops without noticable seam.
Some sounds like wind or cave reverb are easier to make it seamless, but others may not. I have made a page with some tips to help you get a good audio for Looping Clip layer! It is a battle of its own.
Positional ambiences adds to the complexity
As soon as you put in one Looping Clip layer and listen to it, nice, it loops! But the loop is so short and uninteresting. You may think you need more layers to make the ambience sounds more complex than simply looping one clip.
That is true, but also remember the other sources that are playing different ambience as well. Due to positional mixing it can get complex in the end.
Based on where the AudioListener is standing, multiple Looping Clip layer will blend with each other, producing natural and complex result!
Clip
The Clip field should be self-explanatory... but I have some tips and gotchas for you.
- Import settings of this clip can be compressed more than you expected compared to BGM. Wind layer with compression quality 0 can sounds as good as quality 100.
- If you change to the other Layer Mode, this clip reference will be kept. You can come back to see the same clip. But at the same time it is possible to forget a clip reference here. Due to Unity's asset following rule, the other mode won't be using this clip but the clip will be included in the build!
Automations
You can draw some curves so Volume, Pitch (speed), and Stereo Pan on the AudioSource is animated over time.
X axis is the play time in seconds.
Implementation details
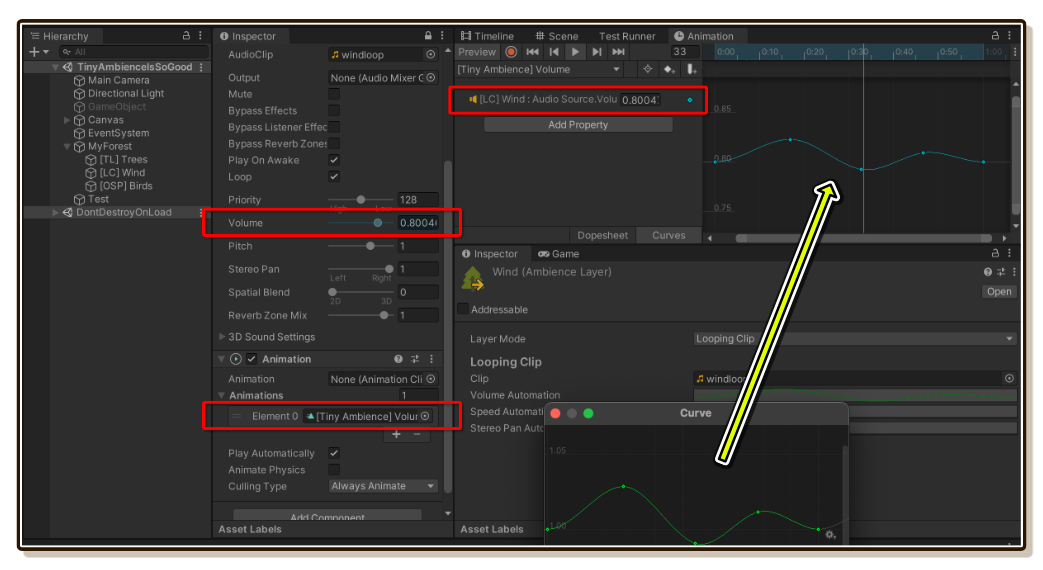
Tiny Ambience will attach (legacy and lightweight) Animation component, generate AnimationClip according to your curves, then play them. Very simple!
Making the automation loop
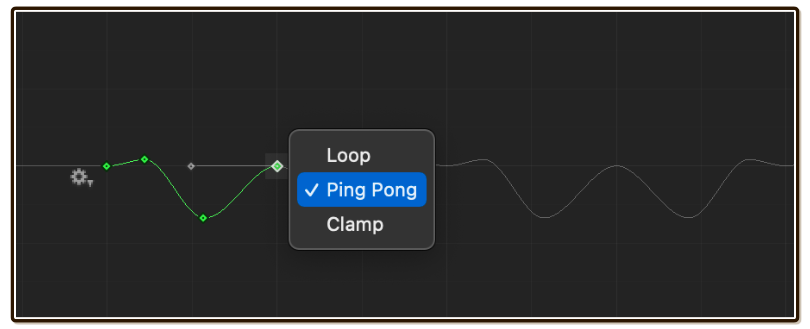
You may expect your automation to loop automatically, but it won't. Your curve starts with Clamp mode which retains the value of the last keyframe.
You must change Wrap Mode at the right edge. Click on the cog wheel at the edge and select Loop or Ping Pong as desired.
Deleting automation
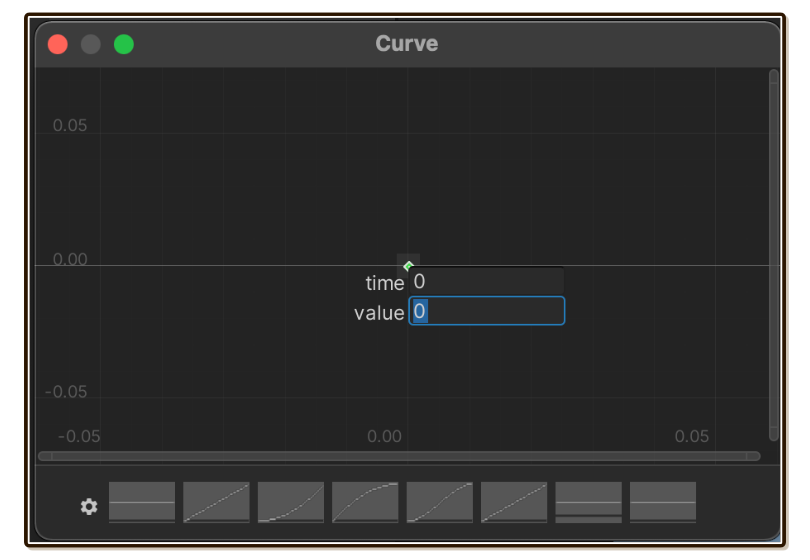
Tiny Ambience has a special case about the curves : If the curve has 1 keyframe no matter what time or value that keyframe is, the curve is ignored.
Unity has one UX problem about the curve, you cannot remove all keyframes. Pressing Cmd/Ctrl + A to select all keyframes then press Delete will left 1 keyframe and it is even not reset to time 0 value 0.
This create some problem in removing the curve. Sometimes the curve to mean "nothing" is a constant 1 (like volume, because multiplication identity is 1), but sometimes the curve to mean nothing is a constant 0 (like interval addition). With this special case, you can Cmd/Ctrl + A and Delete with ease to turn it off.
To create a constant curve without hitting this special case, please put in at least 2 keyframes with the same values.
Creating illusion of a longer audio clip
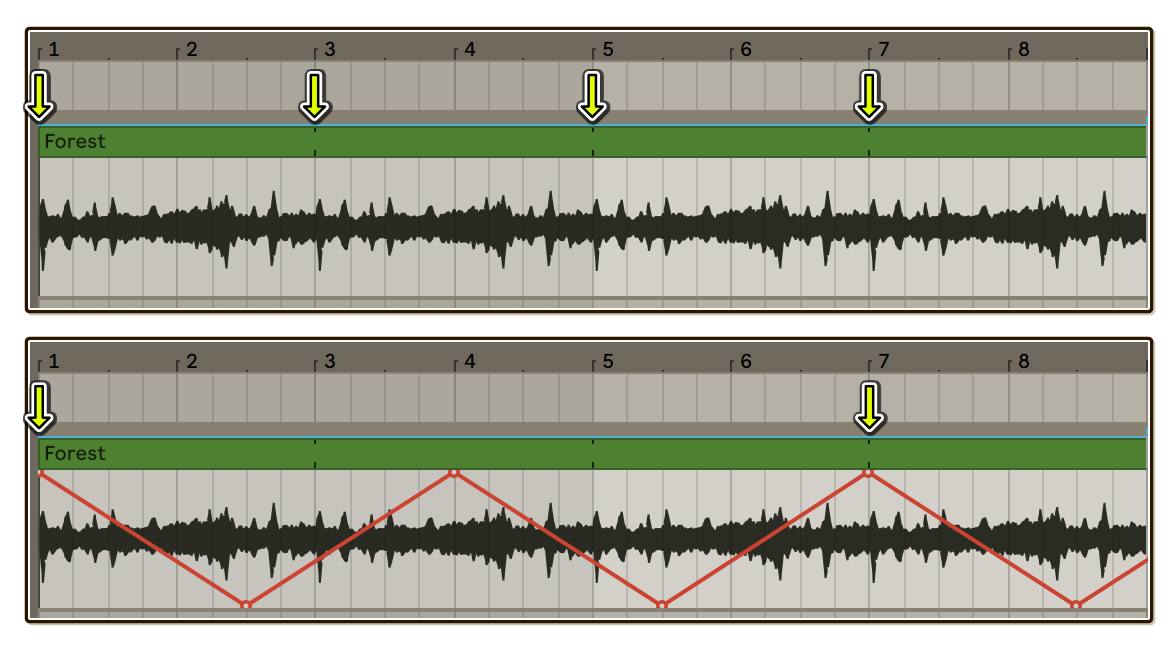
Length of automation in seconds does not need to match length of Clip you used.
You can make use of this to "synthesize" audio. For example, a really bland 0.5 seconds wind loop with 10 seconds Volume Automation can sounds like the wind clip is 10 seconds in length.
Automation summarizing values
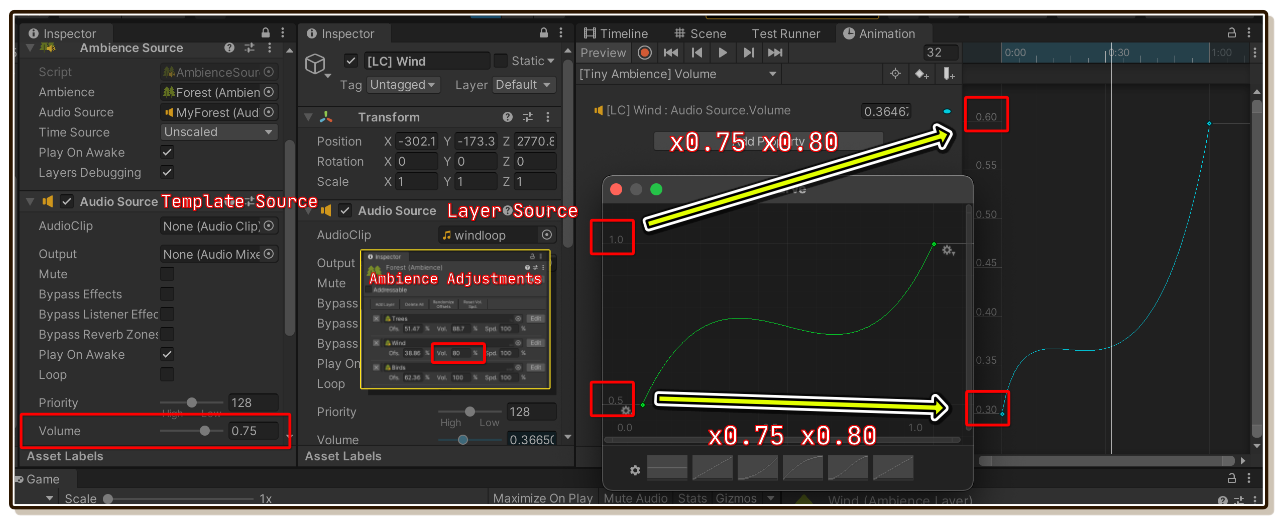
The final volume builds up from many level of adjustments. After what was specify at layer level, Ambience asset that stacks up AmbienceLayer also has one more volume adjustment opportunity. Then later on when you learn about AmbienceSource, there is a template AudioSource which Looping Clip layer will copy and use, that can stack up even more volume adjustment.
Normally, those are all summarized into the AudioSource on the layer for you. e.g. Ambience says play at 80% volume, then template source says play at 75% volume, you get 0.8 * 0.75 = 0.6 on the Volume of your layer.
When using automation, the curve controls these Volume, Pitch, and Stereo Pan fields. An entire curve (all keyframes) will be scaled the same way as single value. I need to tell you this just in case you debug the curve and not seeing expected curve!
Combining layers into an Ambience
- Getting Started/Ambience : When you have made sufficient amount of layers, it is time to create an
Ambiencethat is ready to play.